Replacing the Power Supply Modules
This section describes how to replace the Power Supply module. It describes replacement of the Power Supply module #1 (on left side of chassis), but it also applies to the Power Supply module #2. In addition, it describes replacement of the AC Power Supply module, but it also applies to the DC Power Supply module.
The Power Supply module is hot-swappable and thus, can be replaced without powering down the device (i.e., disconnecting the power source from the second Power Supply module).
|
●
|
Before extracting the Power Supply module, disconnect the power cord from the module. |
|
●
|
Before extracting the Power Supply module (after you have disconnected the power cord), wait at least three seconds for the capacitors to discharge. |
Avertissements: Avant d’extraire un module de Bloc d’alimentation du châssis (après avoir débranché le cordon électrique), patientez au moins 3 secondes que les capacités se déchargent.
|
➢
|
To replace the Power Supply modules: |
|
a.
|
Disconnect the power cord from the power source, and then remove the power cord from the power connection on the module. |
|
b.
|
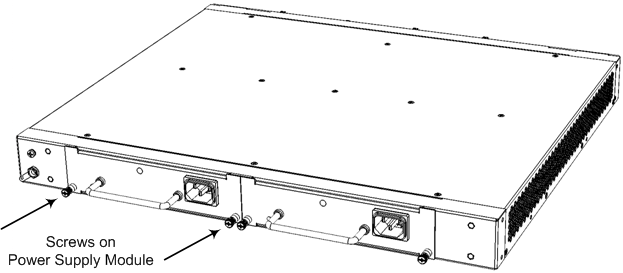
Loosen the two captive screws securing the Power Supply module to the chassis. You can use a Phillips or flathead screwdriver. |
Screws on Power Supply Module (e.g. AC Power Supply Module)
|
c.
|
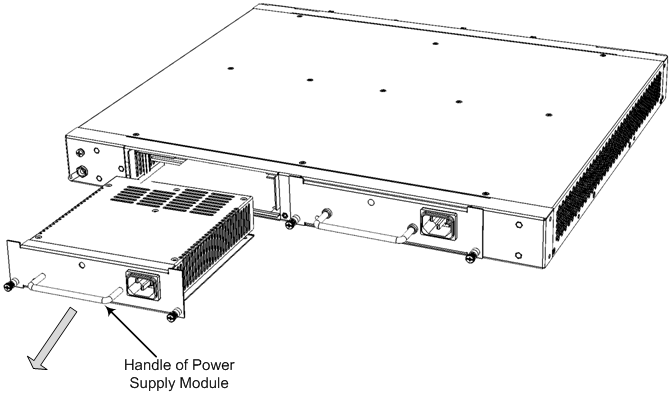
Grip the handle of the Power Supply module, and gently but firmly pull the module out of the chassis slot. |
Extracting Power Supply Module (e.g., AC Power Supply Module)
|
a.
|
Orientate the module as shown in the previous figure (power inlet on the right side). |
|
b.
|
Align the module with the guiding rails located inside the slot. |
|
c.
|
Using the module's handle, gently push the module into the slot until it has engaged with the chassis backplane. |
|
d.
|
Tighten the two captive screws on the front panel of the module to secure the module to the chassis. You can use a Phillips or flathead screwdriver. |